Corrective Action:
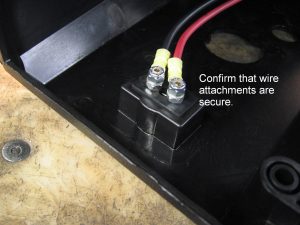
Make certain that 12 volt power is getting to the switch. If not, check the battery and the connection of the wiring harness to the battery. The most common problem is an insufficient ground connection on the negative wiring harness wire. It is possible to measure 12 volts at the switch with a meter, but have a ground connection that will not allow sufficient current to run the motor. Disconnect and clean the ground connection and reassemble. If the problem is still not solved, check for a faulty circuit breaker by temporarily removing it from the system. Also check the entire length of the wiring harness for a broken wire.
Corrective Action:
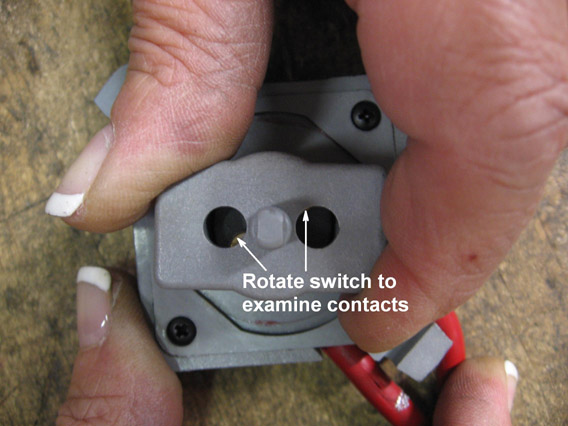
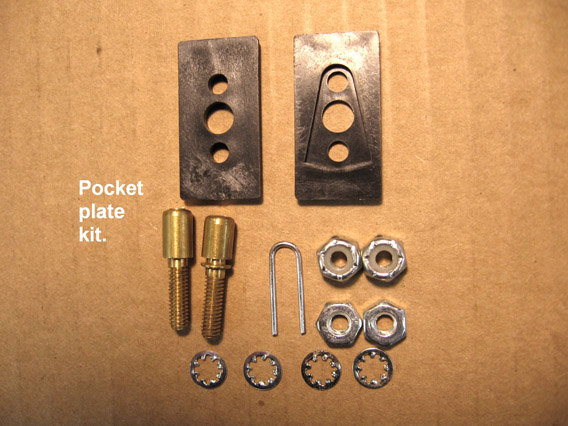
Examine brass studs in the switch pocket to be sure that they are not excessively pitted or leaning due to melted plastic in the bottom of the pocket. Examine switch for signs of melted plastic or excessive pitting on the contacts. Contacts can be viewed by rotating the rectangular portion of the switch until the edges of the contacts come into view through the two round holes. The contact studs in the pocket of the cover can be replaced with the pocket plate kit 5703129 and the switch can be replaced with kit 5240411.

Corrective Action:
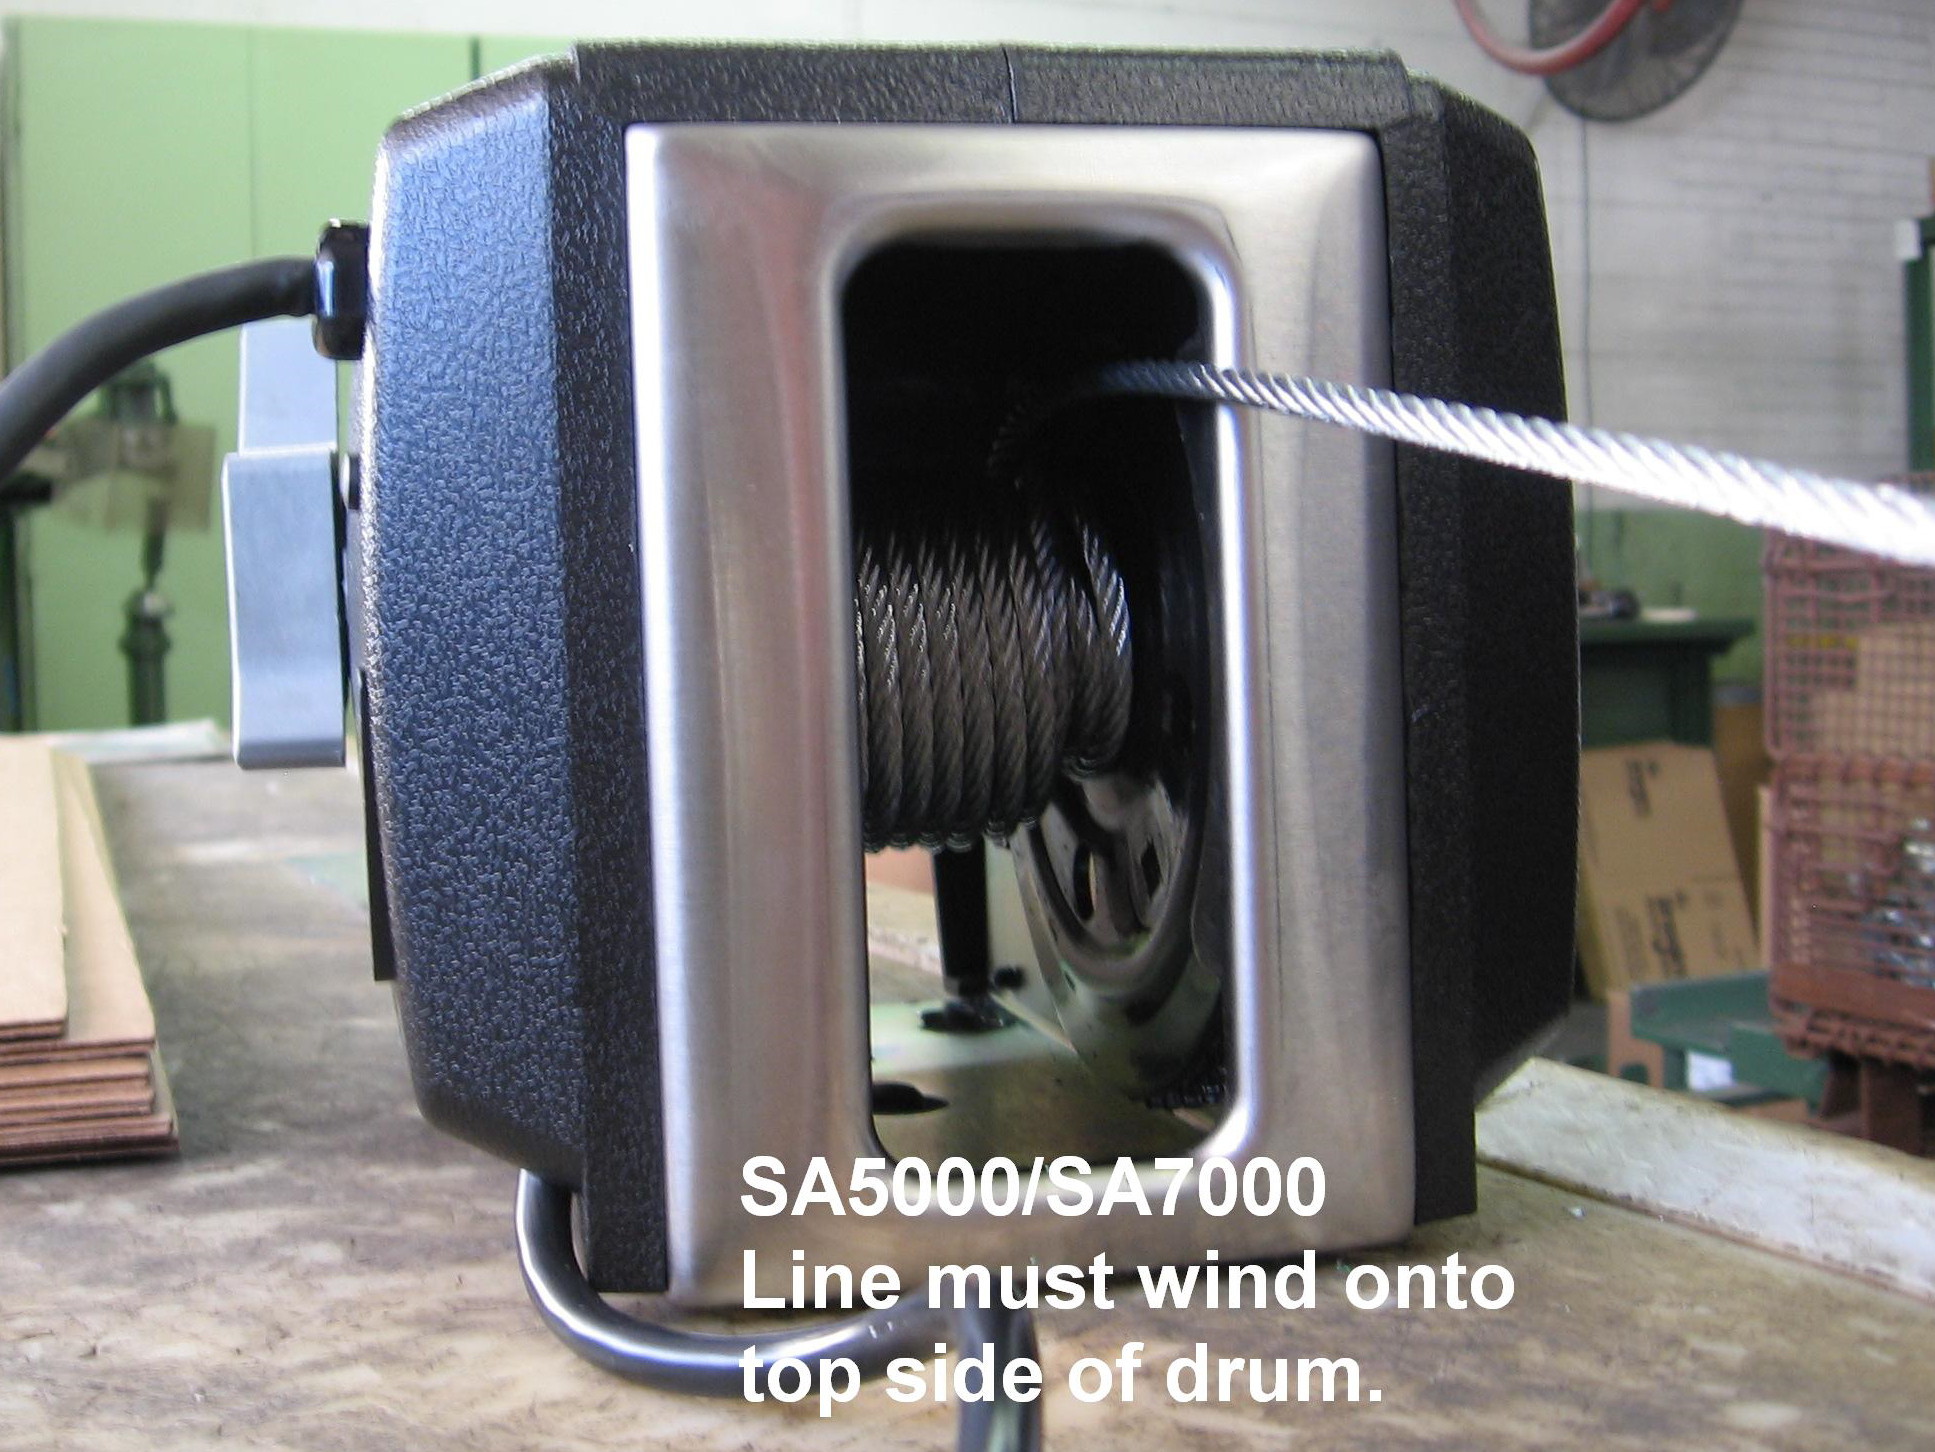
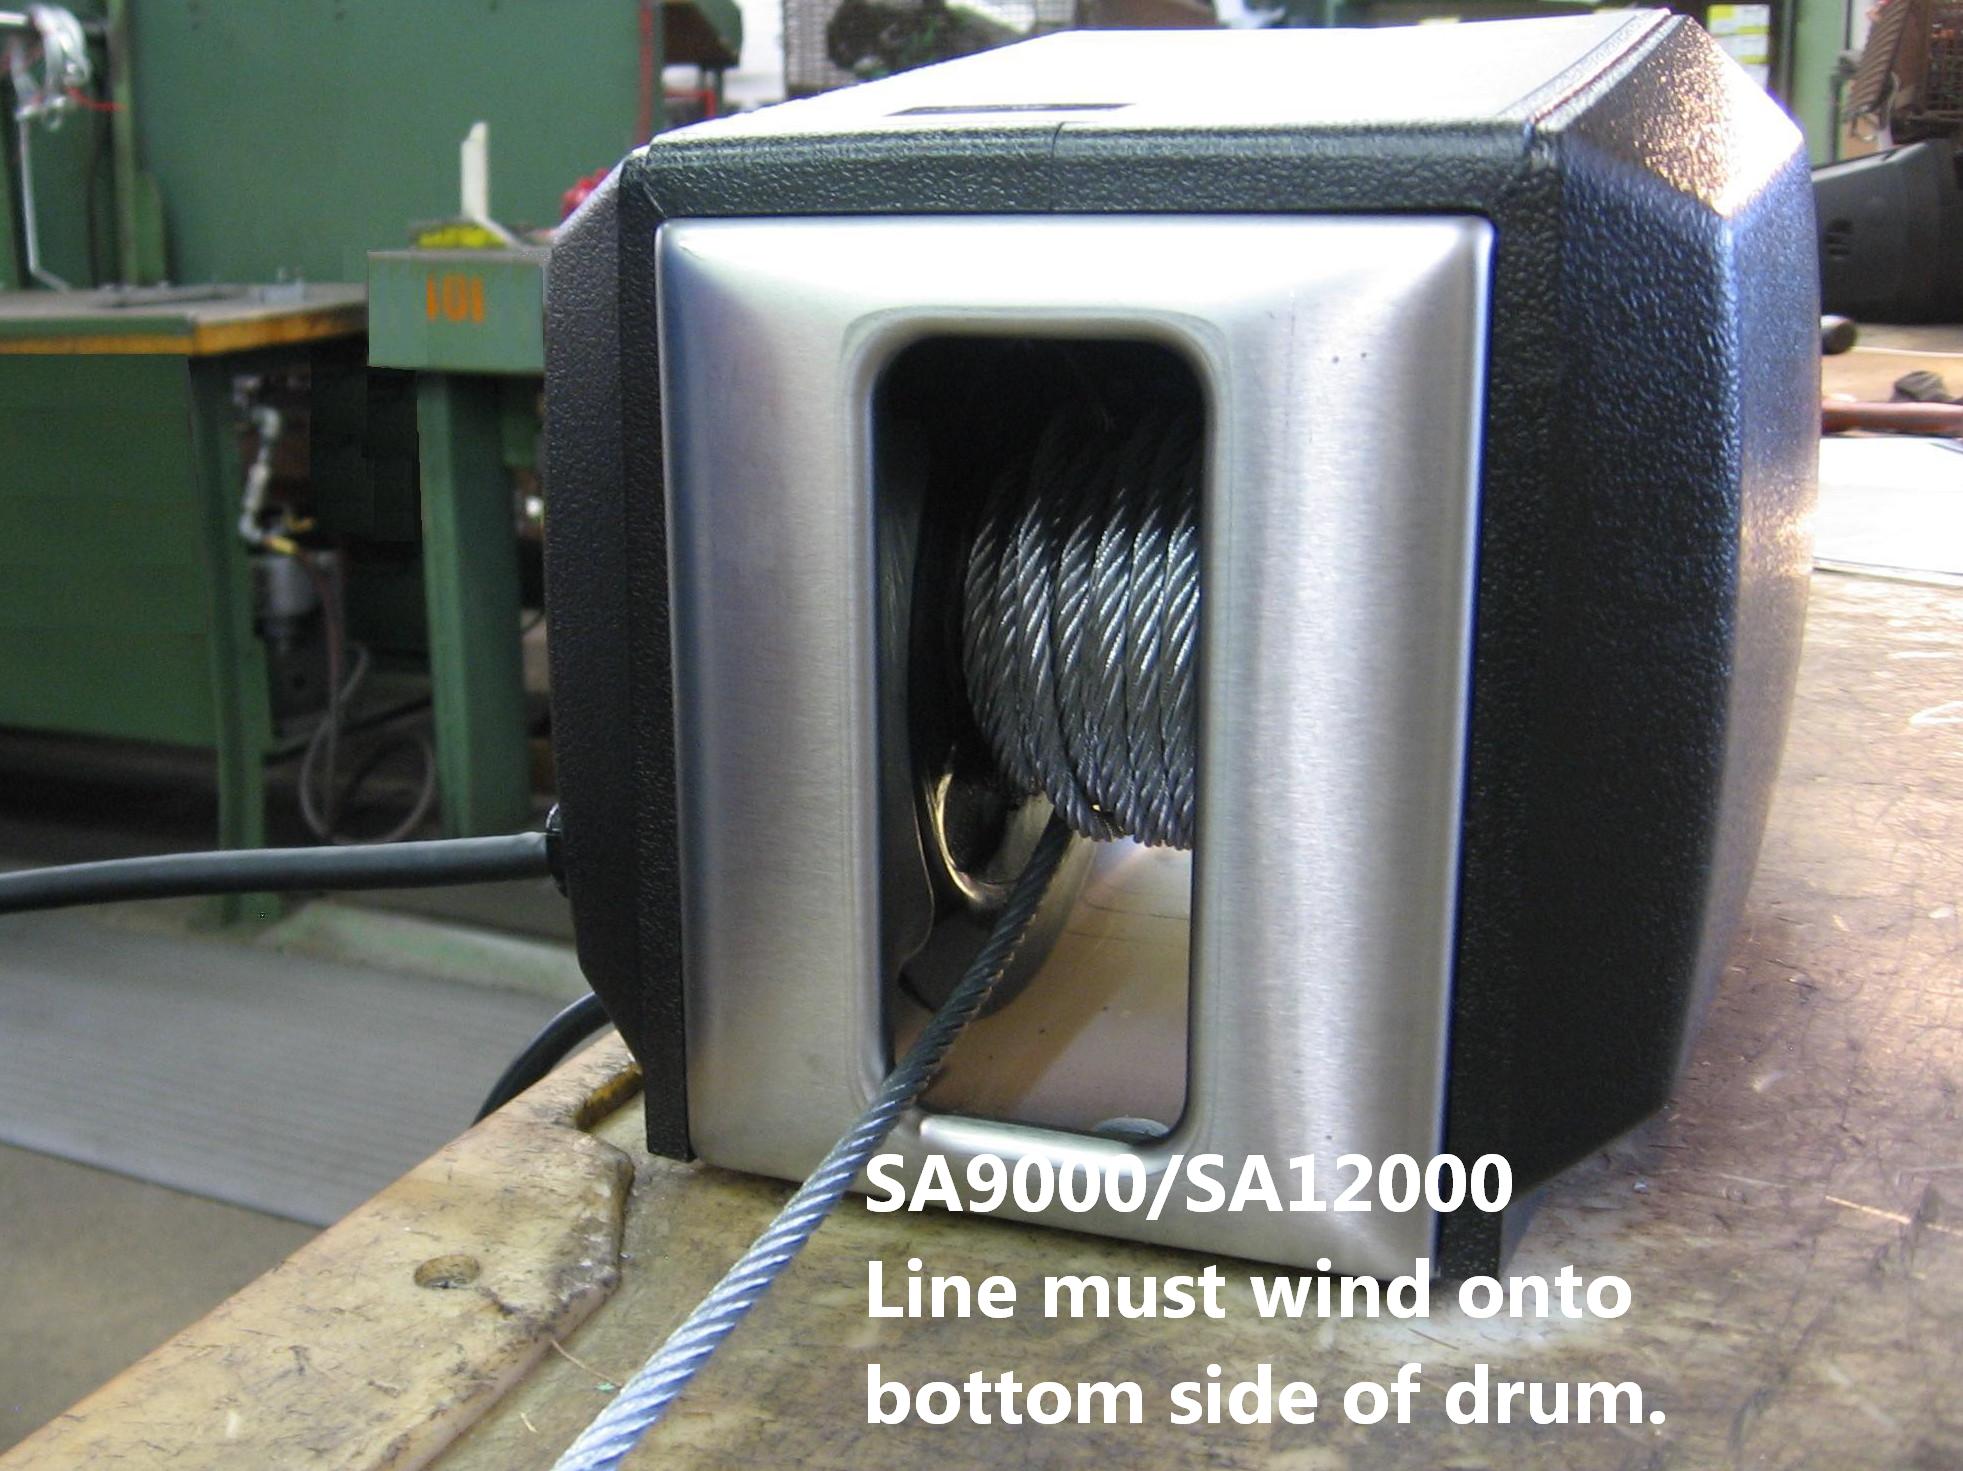
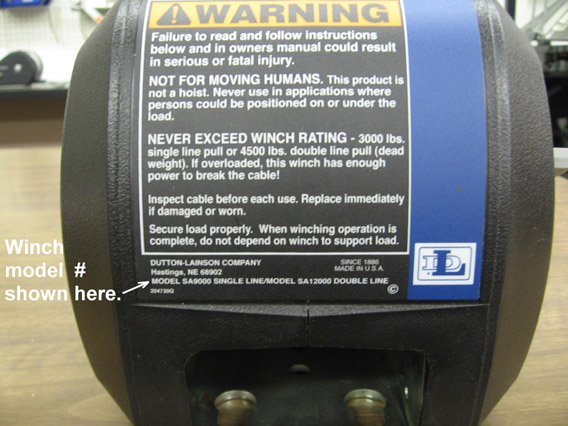
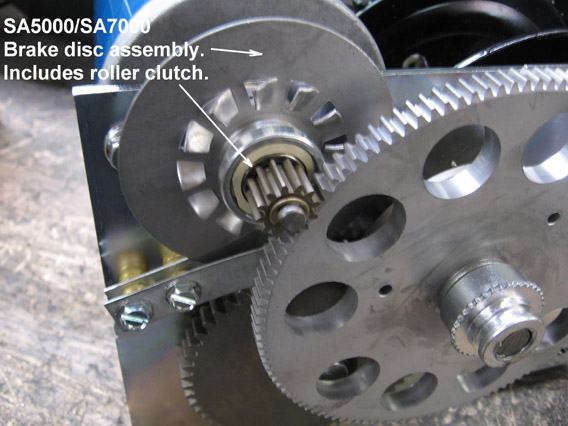
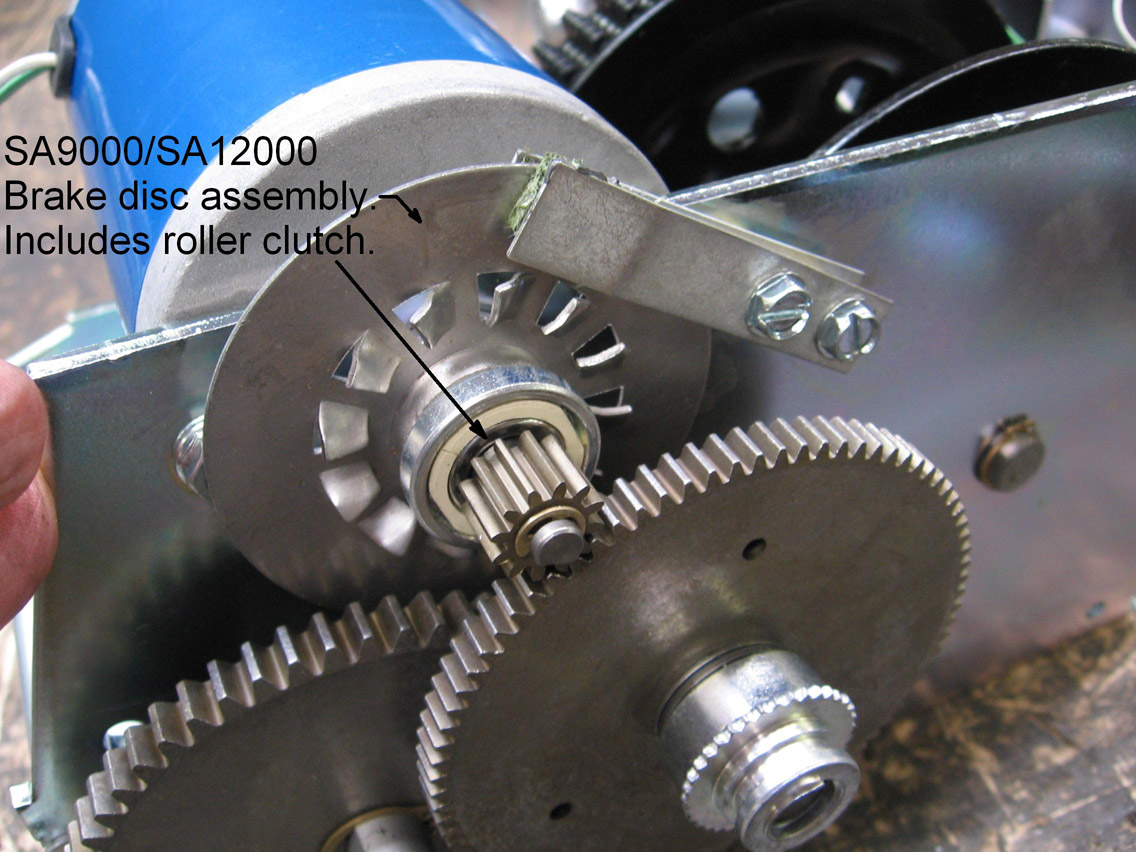
On SA5000/SA7000 models the cable must wind onto the top side of the winch drum and on SA9000/SA12000 models the cable must wind onto the bottom side of the drum. This is critically important and must not be reversed. If you are not sure which model you have, the model number is shown at the bottom of the back decal.
Corrective Action:
If motor slows down a lot and groans to pull load, winch is probably overloaded. Reduce the amount of load being pulled or use a pulley block and hook to increase the pulling capacity of the winch.
Corrective Action:
Move clutch lever to engaged gears position.

Corrective Action:
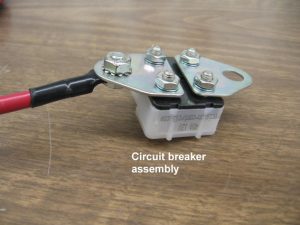
The circuit breaker is designed to cut power to the winch in the event of a substantial overload. It will automatically reset after a short cooling period. Note that the circuit breaker will not protect the motor from damage due to excessive run time.
Corrective Action:
On SA5000/SA7000 models the cable must wind onto the top side of the winch drum and on SA9000/SA12000 models the cable must wind onto the bottom side of the drum. If the cable is wound the wrong direction, the brake will not work. If you are not sure which model you have, the model number is shown at the bottom of the back decal.


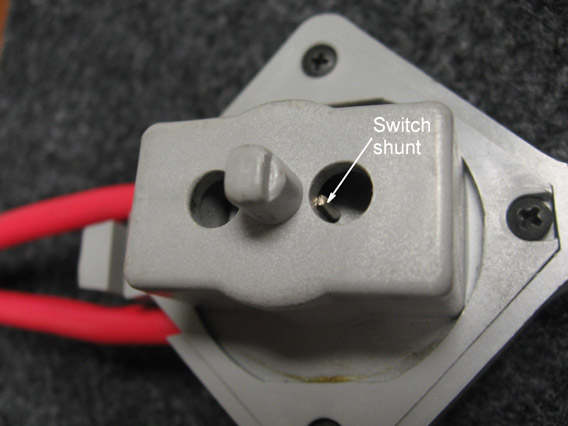
Corrective Action:
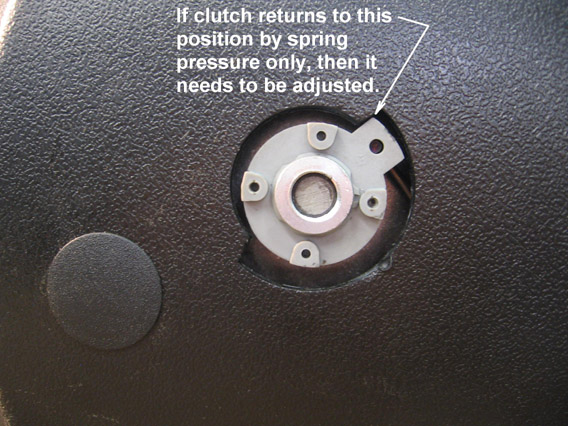
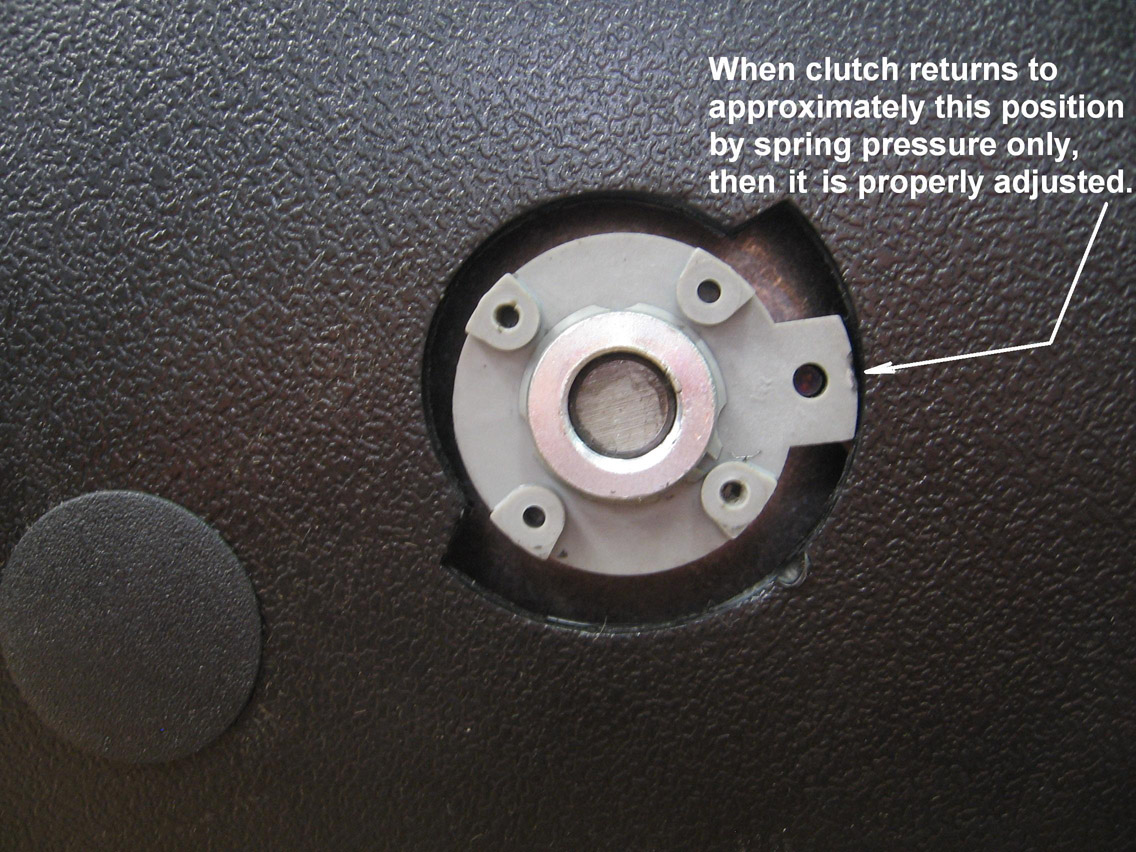
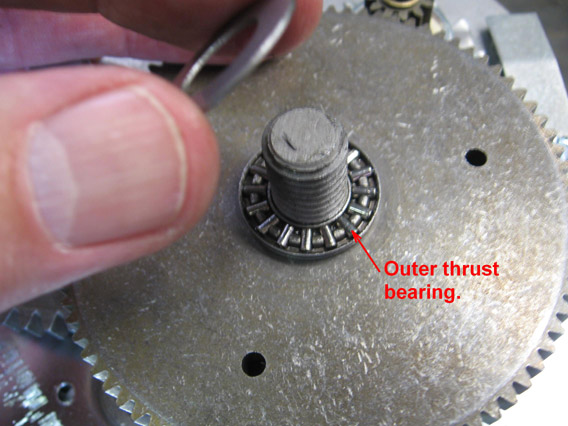
If the winch does not have any difficulty holding the load after it stops, but coasts more than an inch or two before stopping, then the switch shunt may be burned up or not engaging. The winch has two shunts to activate a dynamic brake, one in the switch itself and another is in the bottom of the switch pocket on the side of the winch. The one in the pocket activates the brake when the switch is removed from the winch. The shunt in the switch only makes contact with the studs in the switch pocket when the switch is well centered in the off position. If the switch cannot return to center, the shunt may not activate the dynamic brake. The switch shunt is visible through the holes in the switch (see photo). If it is burned, there is likely other damage to the switch requiring a switch replacement. Order replacement switch kit 5240411. If the shunt in the switch pocket is burned or missing, order pocket plate kit 5703129.
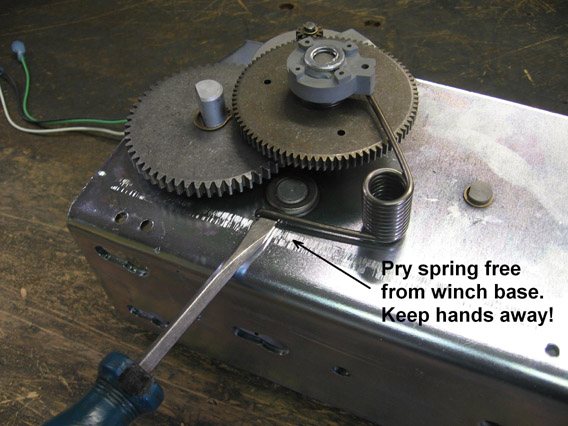
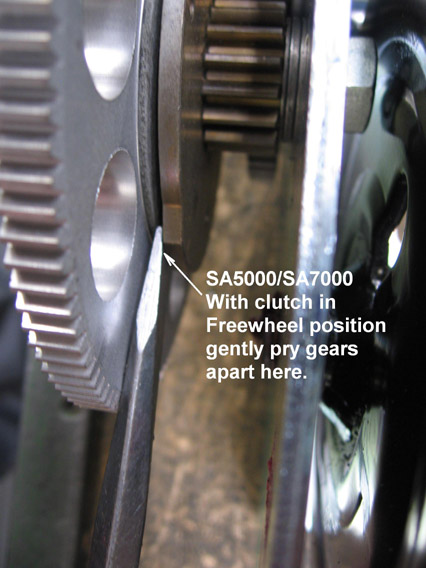
Corrective Action:
First confirm that clutch is in freewheel position. Then with no load on winch jog power switch to see if clutch will open and allow freewheeling. If this does not work, remove any load from the winch, put the clutch lever in the freewheel position and remove the winch cover. Then gently pry the clutch gear and mating gear apart by inserting a screwdriver between them.

Corrective Action:
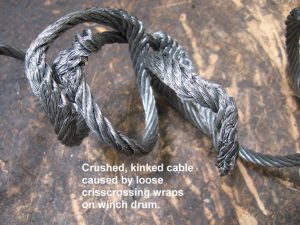
The cable is considered a perishable item and will periodically need to be replaced. Follow these suggestions to maximize cable life: Shorten the cable to the minimum length necessary for your application remembering to keep at least three turns on the drum before starting to pull a load. Excess cable length makes loose, crisscrossing wraps more likely. Make certain that the first layer of cable on the drum is wound neatly and tightly and additional layers will follow in neat, tight wraps. It is essential to keep some tension on the cable during this process. Never start pulling a load with loose cable on the drum. This will almost certainly cause kinks and crushing and wedging cable into lower layers. Allowing loose cable to wind onto drum may also cause it to get caught in gears or other parts causing serious winch damage. It is also important to keep winch reasonably aligned with the load being pulled so that the cable does not severely rub the edges of the cable opening.